
Welcome to a sweet journey across Latin America, where homemade candies aren't just treats; they're a vibrant part of culinary tradition and cultural expression. In this blog post, we dive into the delightful world of Latin America's best homemade sweets, exploring timeless recipes that have been passed down through generations. From the creamy, dreamy Dulce de Leche in Argentina to the rich, chocolaty Brigadeiros of Brazil, these candies offer more than just a sugar rush—they provide a taste of history and heritage.
Whether you're a dessert aficionado, a budding pastry chef, or simply someone who loves to indulge in a bit of sweetness now and then, this exploration will introduce you to some of the most beloved candies across the continent. Not only will we share their stories and secrets, but we'll also guide you through making these delectable treats right in your own kitchen. So, grab your apron, and let's embark on a deliciously sweet adventure through Latin America!
Dulce de Leche: The Sweetheart of the South

One of Latin America's most iconic sweets, Dulce de Leche, is a staple in the culinary landscapes of Argentina and Uruguay. This thick, caramel-like concoction is made by slowly simmering milk and sugar, resulting in a rich, creamy delight that's cherished across the region and beyond.
Origins and Popularity
The history of Dulce de Leche is as rich as its flavor. Though its exact origins are debated, it is widely beloved throughout South America. In Argentina, it's not just a household dessert; it's a national symbol, enjoyed from the bustling streets of Buenos Aires to the quietest rural kitchens.
Making Dulce de Leche at Home
Creating Dulce de Leche at home is a rewarding, if somewhat patience-testing, process. You start with full-fat milk and sugar, simmering them together until they morph into golden, velvety smooth magic. Some add a pinch of vanilla or baking soda to enhance the flavor and color, but the basic principle remains the same: slow cooking to achieve that perfect consistency.
Versatility in Desserts
Dulce de Leche's appeal lies in its versatility. It's fabulous on its own, spooned straight from the jar, but it also transforms any dessert it touches. Spread it over toast, drizzle it on top of ice cream, or use it as a filling for cakes and pastries. In Argentina, it's famously paired with cheese in the dessert 'Vigilante', combining sweet and savory in a surprisingly delightful way.
This beloved confection not only satisfies sweet tooths but also connects those who make it to a rich tradition of dessert-making that speaks to the heart of Southern Latin American culture. Whether you're a seasoned confectioner or a curious cook, Dulce de Leche offers a delicious introduction to the world of homemade Latin American sweets.
Brigadeiros from Brazil
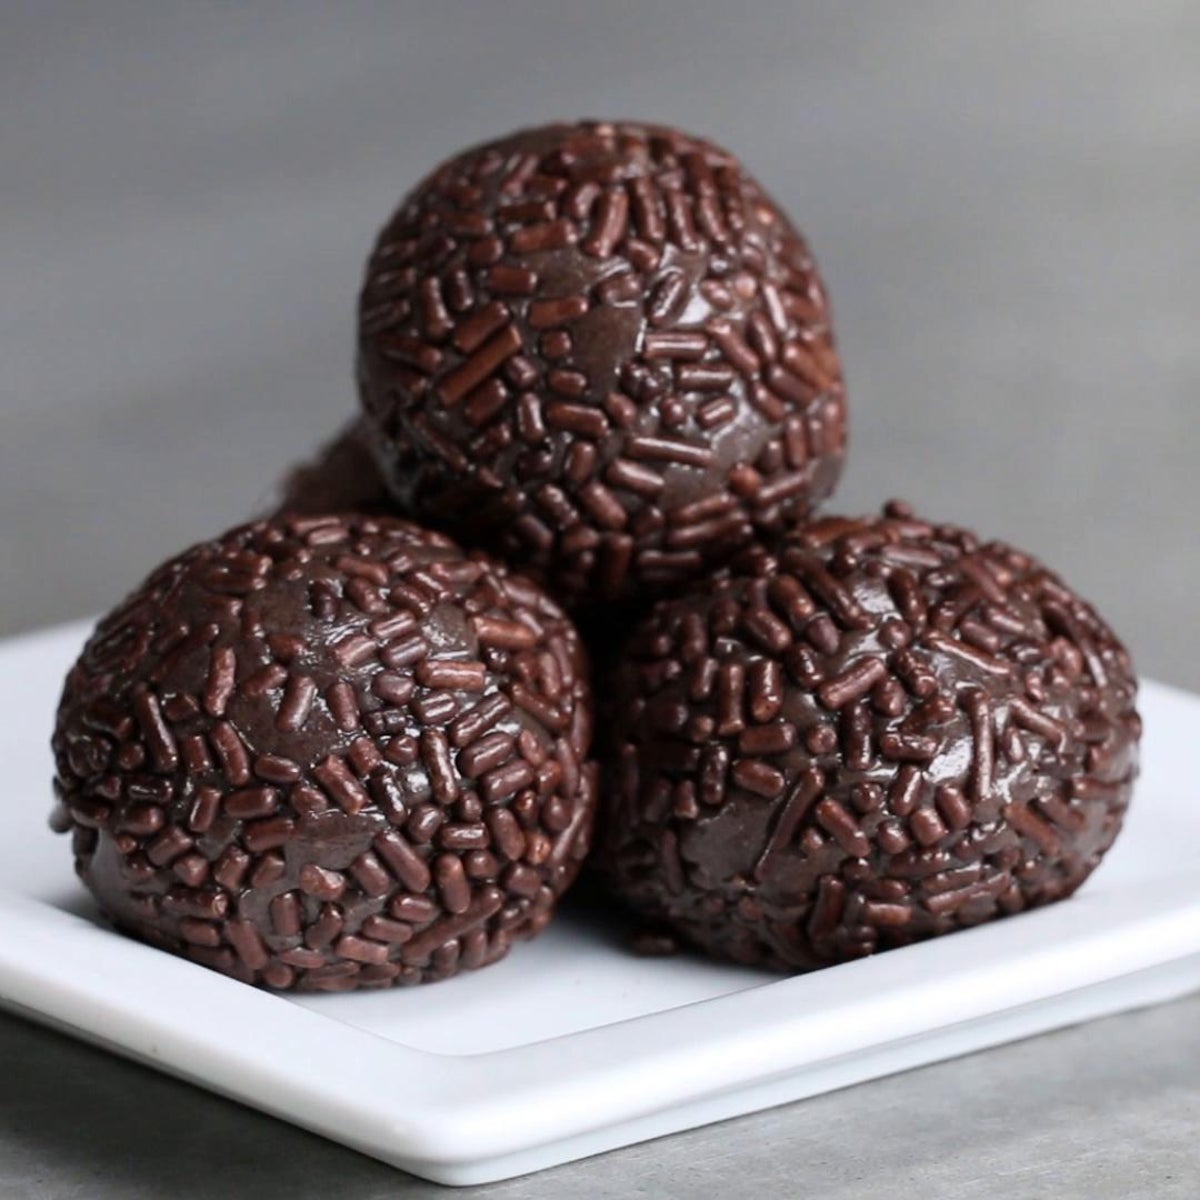
A national treasure of Brazil, Brigadeiros are not just a party treat but a cultural phenomenon. These delightful chocolate balls are a staple at celebrations, particularly birthdays, and have charmed sweet-tooths around the globe with their rich, gooey texture and irresistible taste.
Historical Background
Brigadeiros were created in the 1940s, named after Brigadier Eduardo Gomes, a Brazilian Air Force officer who was running for president. His supporters made these chocolate treats to raise funds during his campaign. Though Gomes did not win the presidency, his namesake sweets won the hearts of Brazilians and have remained popular ever since.
Making Brigadeiros at Home
Making Brigadeiros is straightforward and fun, making it an excellent activity for family gatherings. The traditional recipe involves condensing milk, unsweetened cocoa powder, and butter, cooked slowly until thickened. Once the mixture is cool enough to handle, it's rolled into balls and covered in chocolate sprinkles. The simplicity of the ingredients and the process allows even novice cooks to achieve delicious results.
Tips for Customizing Brigadeiros
One of the joys of Brigadeiros is how easily they can be customized. While traditional Brigadeiros are rolled in chocolate sprinkles, you can experiment with different coatings to suit your taste. Try rolling them in chopped nuts for a crunchy texture, coconut flakes for a tropical twist, or powdered sugar for a sweet, snow-dusted appearance. Each variation not only adds a unique flavor but also makes these treats visually appealing and perfect for any festive occasion.
Brigadeiros are more than just a candy; they're a part of Brazilian heritage and a symbol of communal joy and celebration. Whether you're crafting them for a party or simply as a treat for yourself, making Brigadeiros allows you to bring a piece of Brazilian joy into your kitchen.
Mexican Tamarind Candies

Tamarind, a tart and tangy fruit, is a key ingredient in Mexican cuisine, not just for savory dishes but also in the world of sweets. Mexican tamarind candies, known as dulces de tamarindo, are a perfect blend of sweet, sour, and spicy flavors, offering a truly unique taste experience that's hard to find elsewhere.
Overview of Tamarind in Mexican Cuisine
Tamarind is originally from Africa but has been embraced by many tropical countries, including Mexico, where it has become integral to local culinary traditions. The fruit's pulp is used in various dishes, from refreshing beverages to spicy candies, showcasing its versatility.
Making Tamarind Candies at Home
Creating tamarind candies at home is an adventure in taste. The process involves extracting the pulp from tamarind pods, which is then cooked with sugar and often combined with chili powder to create a spicy-sweet paste. This paste can be shaped into balls or small bars and rolled in sugar or more chili powder, depending on personal preference.
Variations and Regional Differences
In Mexico, the recipes for tamarind candies can vary significantly from one region to another. Some areas prefer their candies with a stronger kick of chili, while others might add a touch of salt to enhance the tamarind's natural sourness. There are also commercial versions available, ranging from soft and chewy to hard and brittle, but homemade versions allow for customization to suit any palate.
These candies are not only a treat to eat but also fun to make, especially when experimenting with different levels of sweetness and spiciness. Tamarind candies beautifully encapsulate the spirit of Mexican confectionery—bold, vibrant, and full of flavor. Whether you're new to tamarind or an experienced aficionado, making these candies at home can connect you with a deep and delicious aspect of Mexican culture.
Colombian Arequipe
In Colombia, a spoonful of Arequipe (known as Dulce de Leche in other parts of Latin America) can transform simple snacks into decadent pleasures. This beloved confection is similar to the Argentinian Dulce de Leche but holds a special place in Colombian hearts, often featured in various festivals and family gatherings.
Description of Arequipe
Arequipe is a creamy, caramel-like spread made from slowly cooked milk and sugar. The result is a thick, rich confection that’s darker and somewhat thicker than its Argentinian counterpart. It's not uncommon to find versions infused with flavors like vanilla or cinnamon, which add a delightful complexity to the treat.
Cultural Importance and Festive Use
In Colombia, Arequipe is more than just a dessert; it's a cultural icon. It's a popular gift item during holidays and is essential at celebrations, often served with cheese or spread on small wafers. It’s also a common prize at local fairs, where winning a jar of homemade Arequipe is a coveted prize.
Recipe and Tips for Achieving the Perfect Consistency at Home
Making Arequipe at home requires patience but is incredibly rewarding. The key is in the slow cooking process, which involves constant stirring to prevent burning and ensure even caramelization. For those looking to try this at home, here’s a simple guide:
- Combine milk and sugar in a heavy-bottomed pot.
- Cook over low heat, stirring frequently, until the mixture thickens and takes on a deep caramel color.
- To prevent crystallization, a few drops of lime juice can be added.
- Once the desired thickness is reached, cool and store in jars.
This process can take several hours, but the result is a versatile confection that can be enjoyed in numerous ways—spread on toast, served over ice cream, or even eaten straight from the spoon.
Arequipe’s irresistible charm lies in its simplicity and the depth of flavor it brings to simple ingredients. Whether you’re a seasoned dessert maker or a curious beginner, the process of making Arequipe is a delightful exploration into the heart of Colombian sweetness.
Peruvian King Kong
King Kong is a unique and beloved dessert in Peru, distinguished by its generous layers of manjar blanco (a variation of dulce de leche), fruit fillings, and sometimes nuts, all sandwiched between thin layers of biscuit. This sweet is particularly popular in the city of Lambayeque, but its fame and enjoyment stretch across the country.
Introduction to King Kong
This multi-layered confection is typically prepared in large rectangles or squares and then cut into smaller, more manageable pieces. It's named "King Kong" not only for its substantial size but also for its robust combination of flavors. Traditionally, it is a favorite during local festivals and is often given as a gift wrapped in colorful packaging.
How to Make King Kong
Making King Kong at home can be a delightful project. The process involves preparing several key components:
- Manjar Blanco: This is the Peruvian version of dulce de leche, cooked until it's particularly thick.
- Biscuit Layers: Homemade or store-bought thin cookies or pastry layers are used as the base.
- Fruit Fillings: Pineapple and peach are the most traditional, but some variations use other fruits like figs or apricots.
Layering Techniques
To assemble King Kong, start by laying down a biscuit layer, then spread a generous amount of manjar blanco over it. Next, add a layer of fruit filling and cover it with another biscuit layer. Repeat this process until all ingredients are used up, typically forming three to five layers. The final layer should be a biscuit topped with a spread of manjar blanco.
Ideas for Filling Variations and Serving Suggestions
While traditional fillings are delightful, experimenting with different fruits or adding nuts can personalize your King Kong. Serve slices of this rich dessert with a light dusting of powdered sugar or alongside a cup of coffee or tea to balance its sweetness.
King Kong's appeal lies in its layered complexity and the joy it brings to special occasions. By making this treat at home, you can bring a piece of Peruvian festivity into your kitchen and share a deliciously layered slice of Peru’s culinary heritage with family and friends.
In conclusion, throughout Latin America, homemade candies like Dulce de Leche, Brigadeiros, Tamarind candies and King Kong are not just treats; they are emblematic of the regions’ diverse cultures and histories. Each sweet has its own story, rooted deeply in the traditions and festivities that define its country of origin. These delicacies offer more than just delightful flavors; they provide a glimpse into the heart and soul of Latin American culinary art.
We've traveled across the continent in this post, exploring how simple ingredients like milk, sugar, and fruit can be transformed into extraordinary desserts. Whether it's the gooey richness of Brazilian Brigadeiros, the tangy kick of Mexican Tamarind candies or the layered complexity of Peruvian King Kong, these sweets represent the spirit of innovation and community that is central to Latin American cuisine.
As you attempt to recreate these candies at home, remember that each batch comes with the opportunity to put your own twist on traditional recipes. Experiment with flavors, textures, and ingredients to make each treat uniquely yours. More importantly, share these creations with friends and family, as these sweets are meant to be enjoyed together, strengthening bonds and making new memories.
So, tie on your apron, warm up your stovetop, and ready your sweet tooth for a delightful culinary adventure. The rich tapestry of Latin American desserts is vast and varied, and there's always more to explore and enjoy. Happy cooking, and even happier tasting!


